Creating a table with Ninja Tables is simple and fast!
Install and activate Ninja Tables on your dashboard and try all the magic tricks this plugin comes with.
Let’s look at how to create a table.
Add Table #
- First, go to the WordPress Dashboard. Then navigate to the Ninja Tables Plugin from the sidebar.
- Now, Click the Add Table button on your screen’s top right.
- After clicking the Add Table button, a popup will appear with a menu of multiple table creation options.
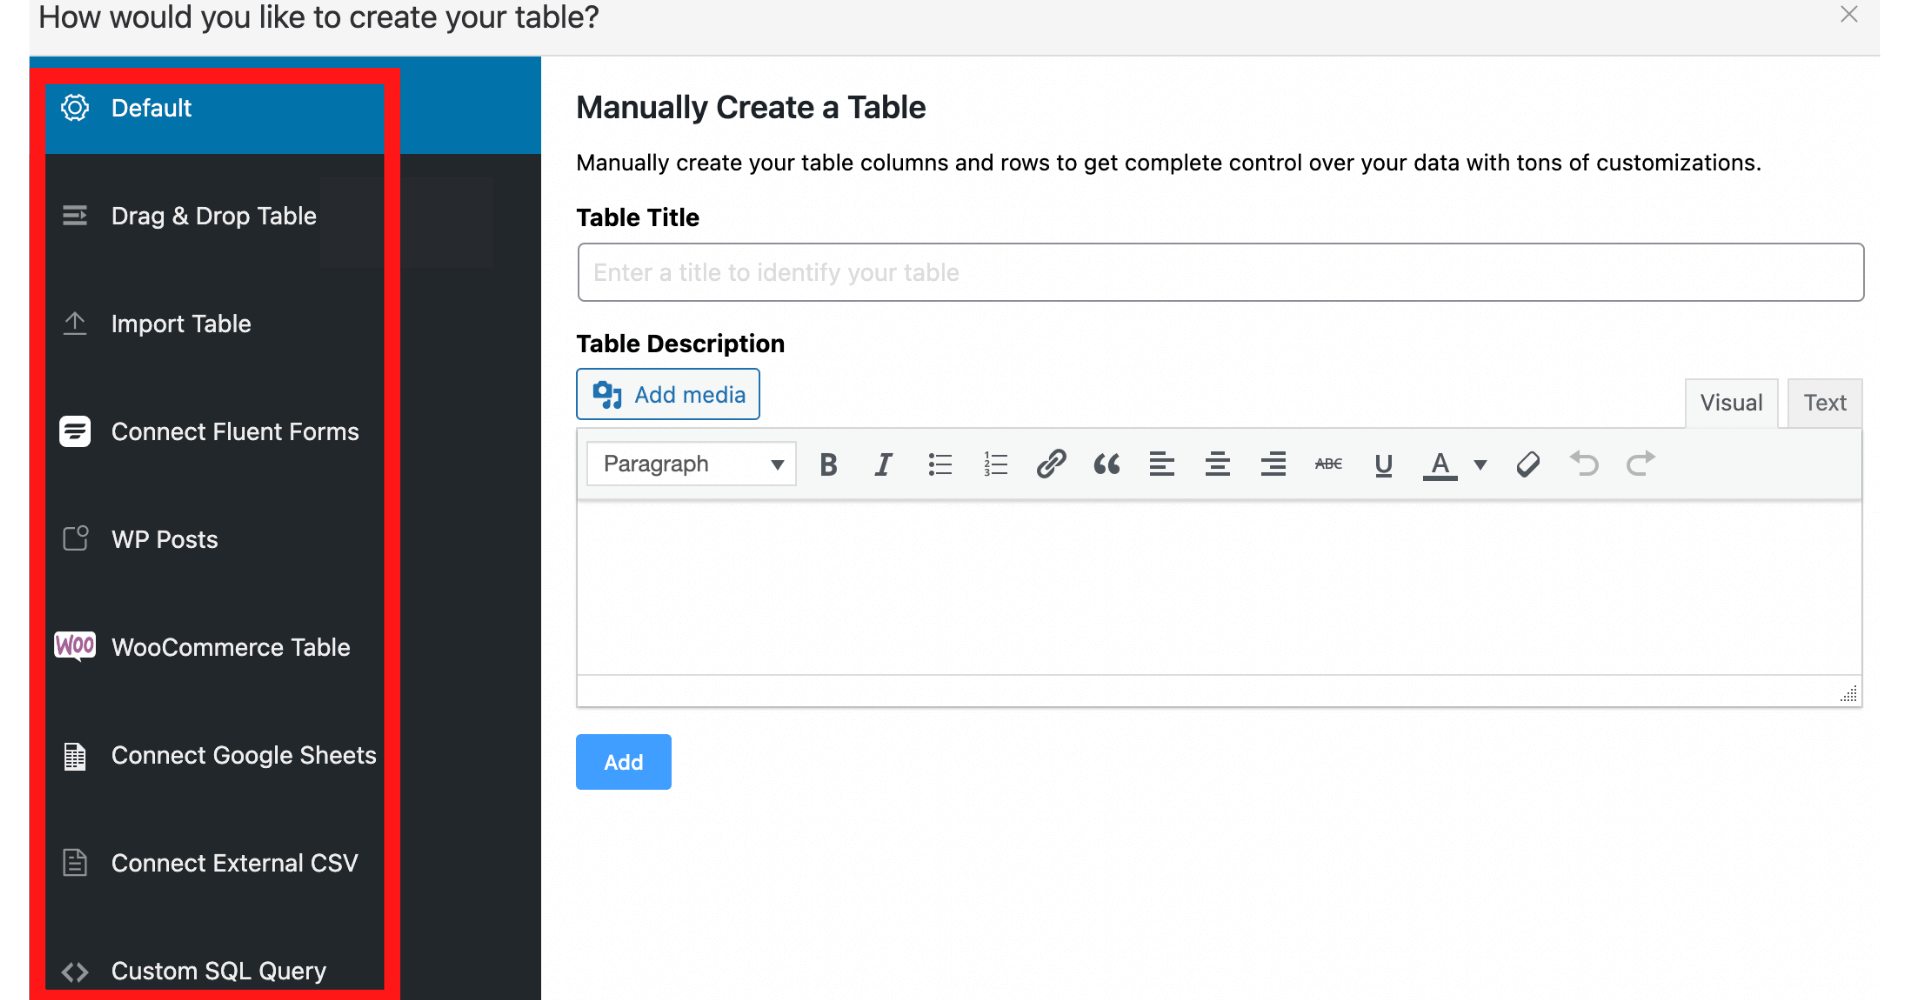
- Ninja Tables offers 9 dynamic table creation options, including WooCommerce product tables. You can pick any option to create a new table. We’re picking the “Default” or manual table creation.
- You can see some text boxes on the right side under “Manually Create a Table”- Table Title & Description.
- Give your table a name first, the description is optional, and then, hit the Add button to add a new table.
- Clicking on the Add button will send you to the Table Rows tab.
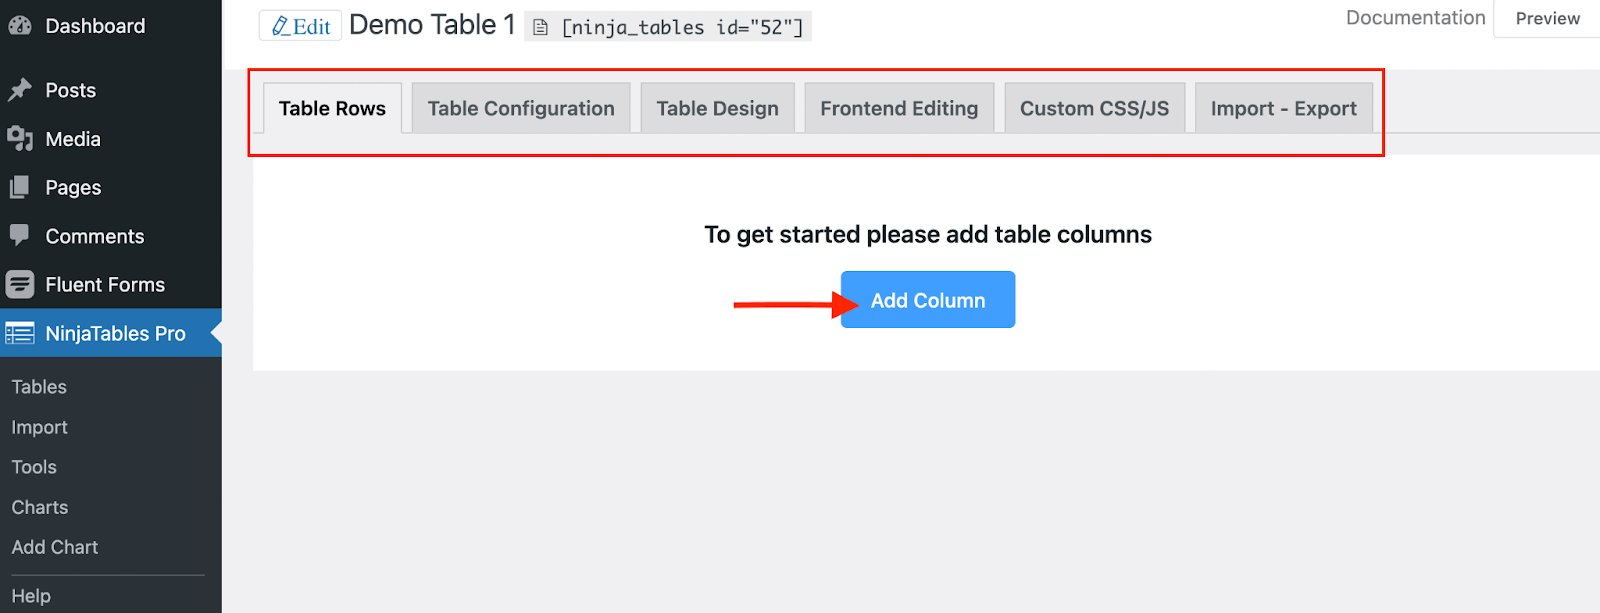
Table Rows #
- Initially, in the Table Rows tab, you will find only the Add Column button, to create columns. And several other tabs to configure the table. We’ll get to that later.
- After clicking the button, an Add Table Column popup will appear with Column Name and Column Key.
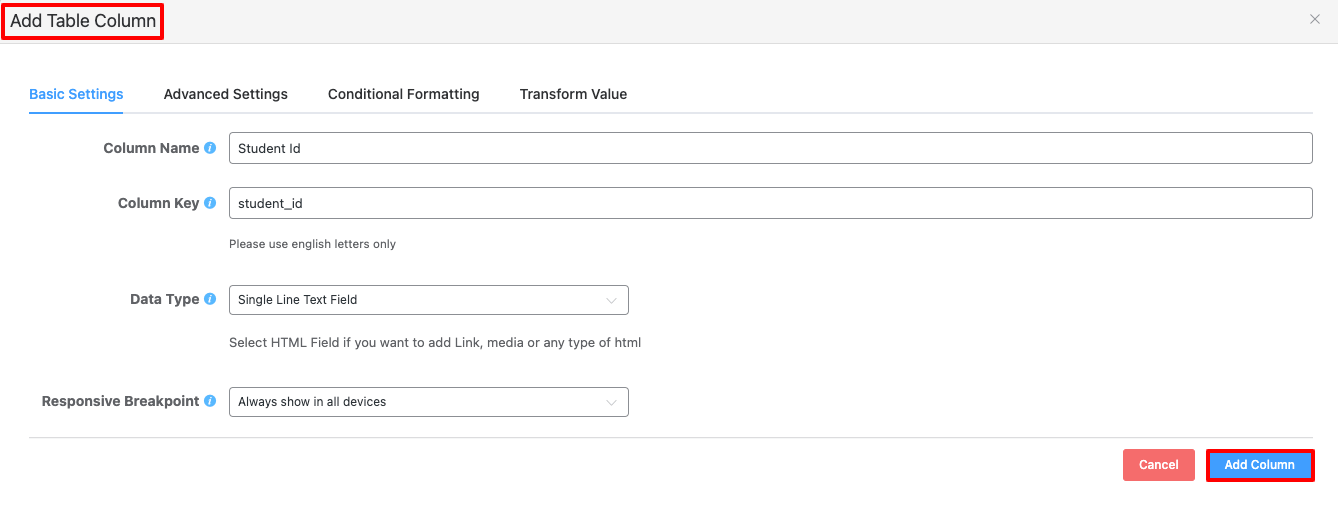
- After you hit the blue button below to “Add Column,” you will get two buttons in the top right corner of a new window. One is for creating columns, and another is for the data input into the columns.

- Here you have Bulk Actions, Compact View, and Sort Manually options. You can use the Search Field to find the rows you’re looking for.
- You may quickly drag and drop your rows and arrange them as needed by enabling the Sort Manually option.
Table Configuration Tab #
- In this tab, you can add a column and configure your desired Column Name, Column Key (Column key will automatically generate based on your given column name), Data type, Responsive breakpoint, and so on.
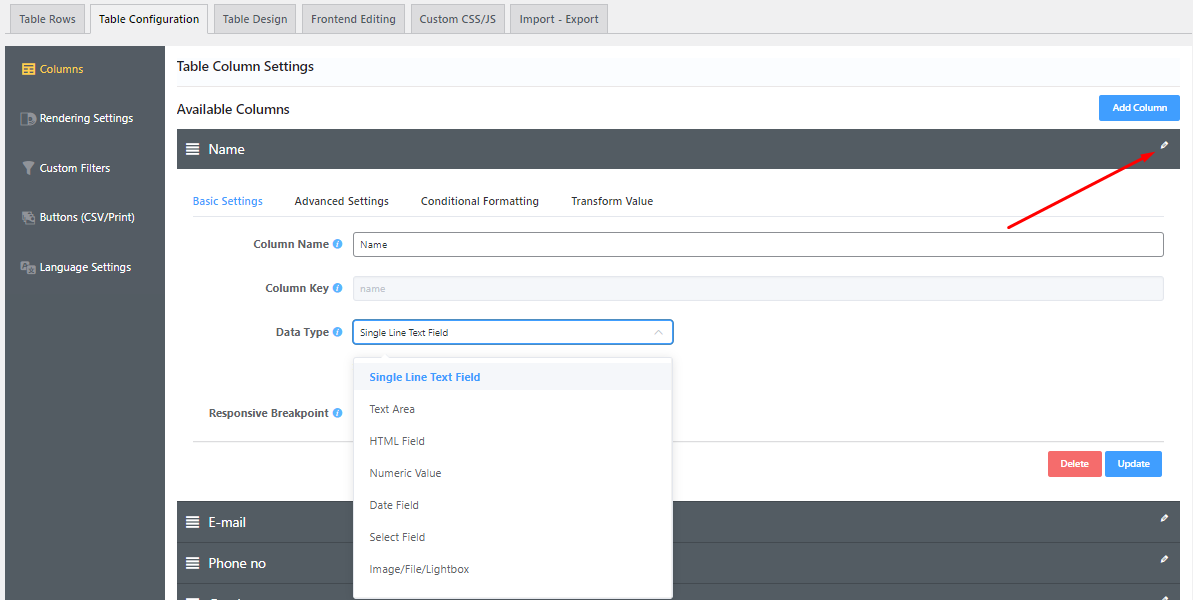
- To configure each column, you need to click on the edit icon to get four different options. They are Basic Settings, Advanced Settings, Conditional Formatting, Transform Values, etc.
Basic Settings #
Using Basic Settings, you can do basic configuration, including responsive breakpoints of your table configuration. Or change the data type of the column.
Advanced Settings #
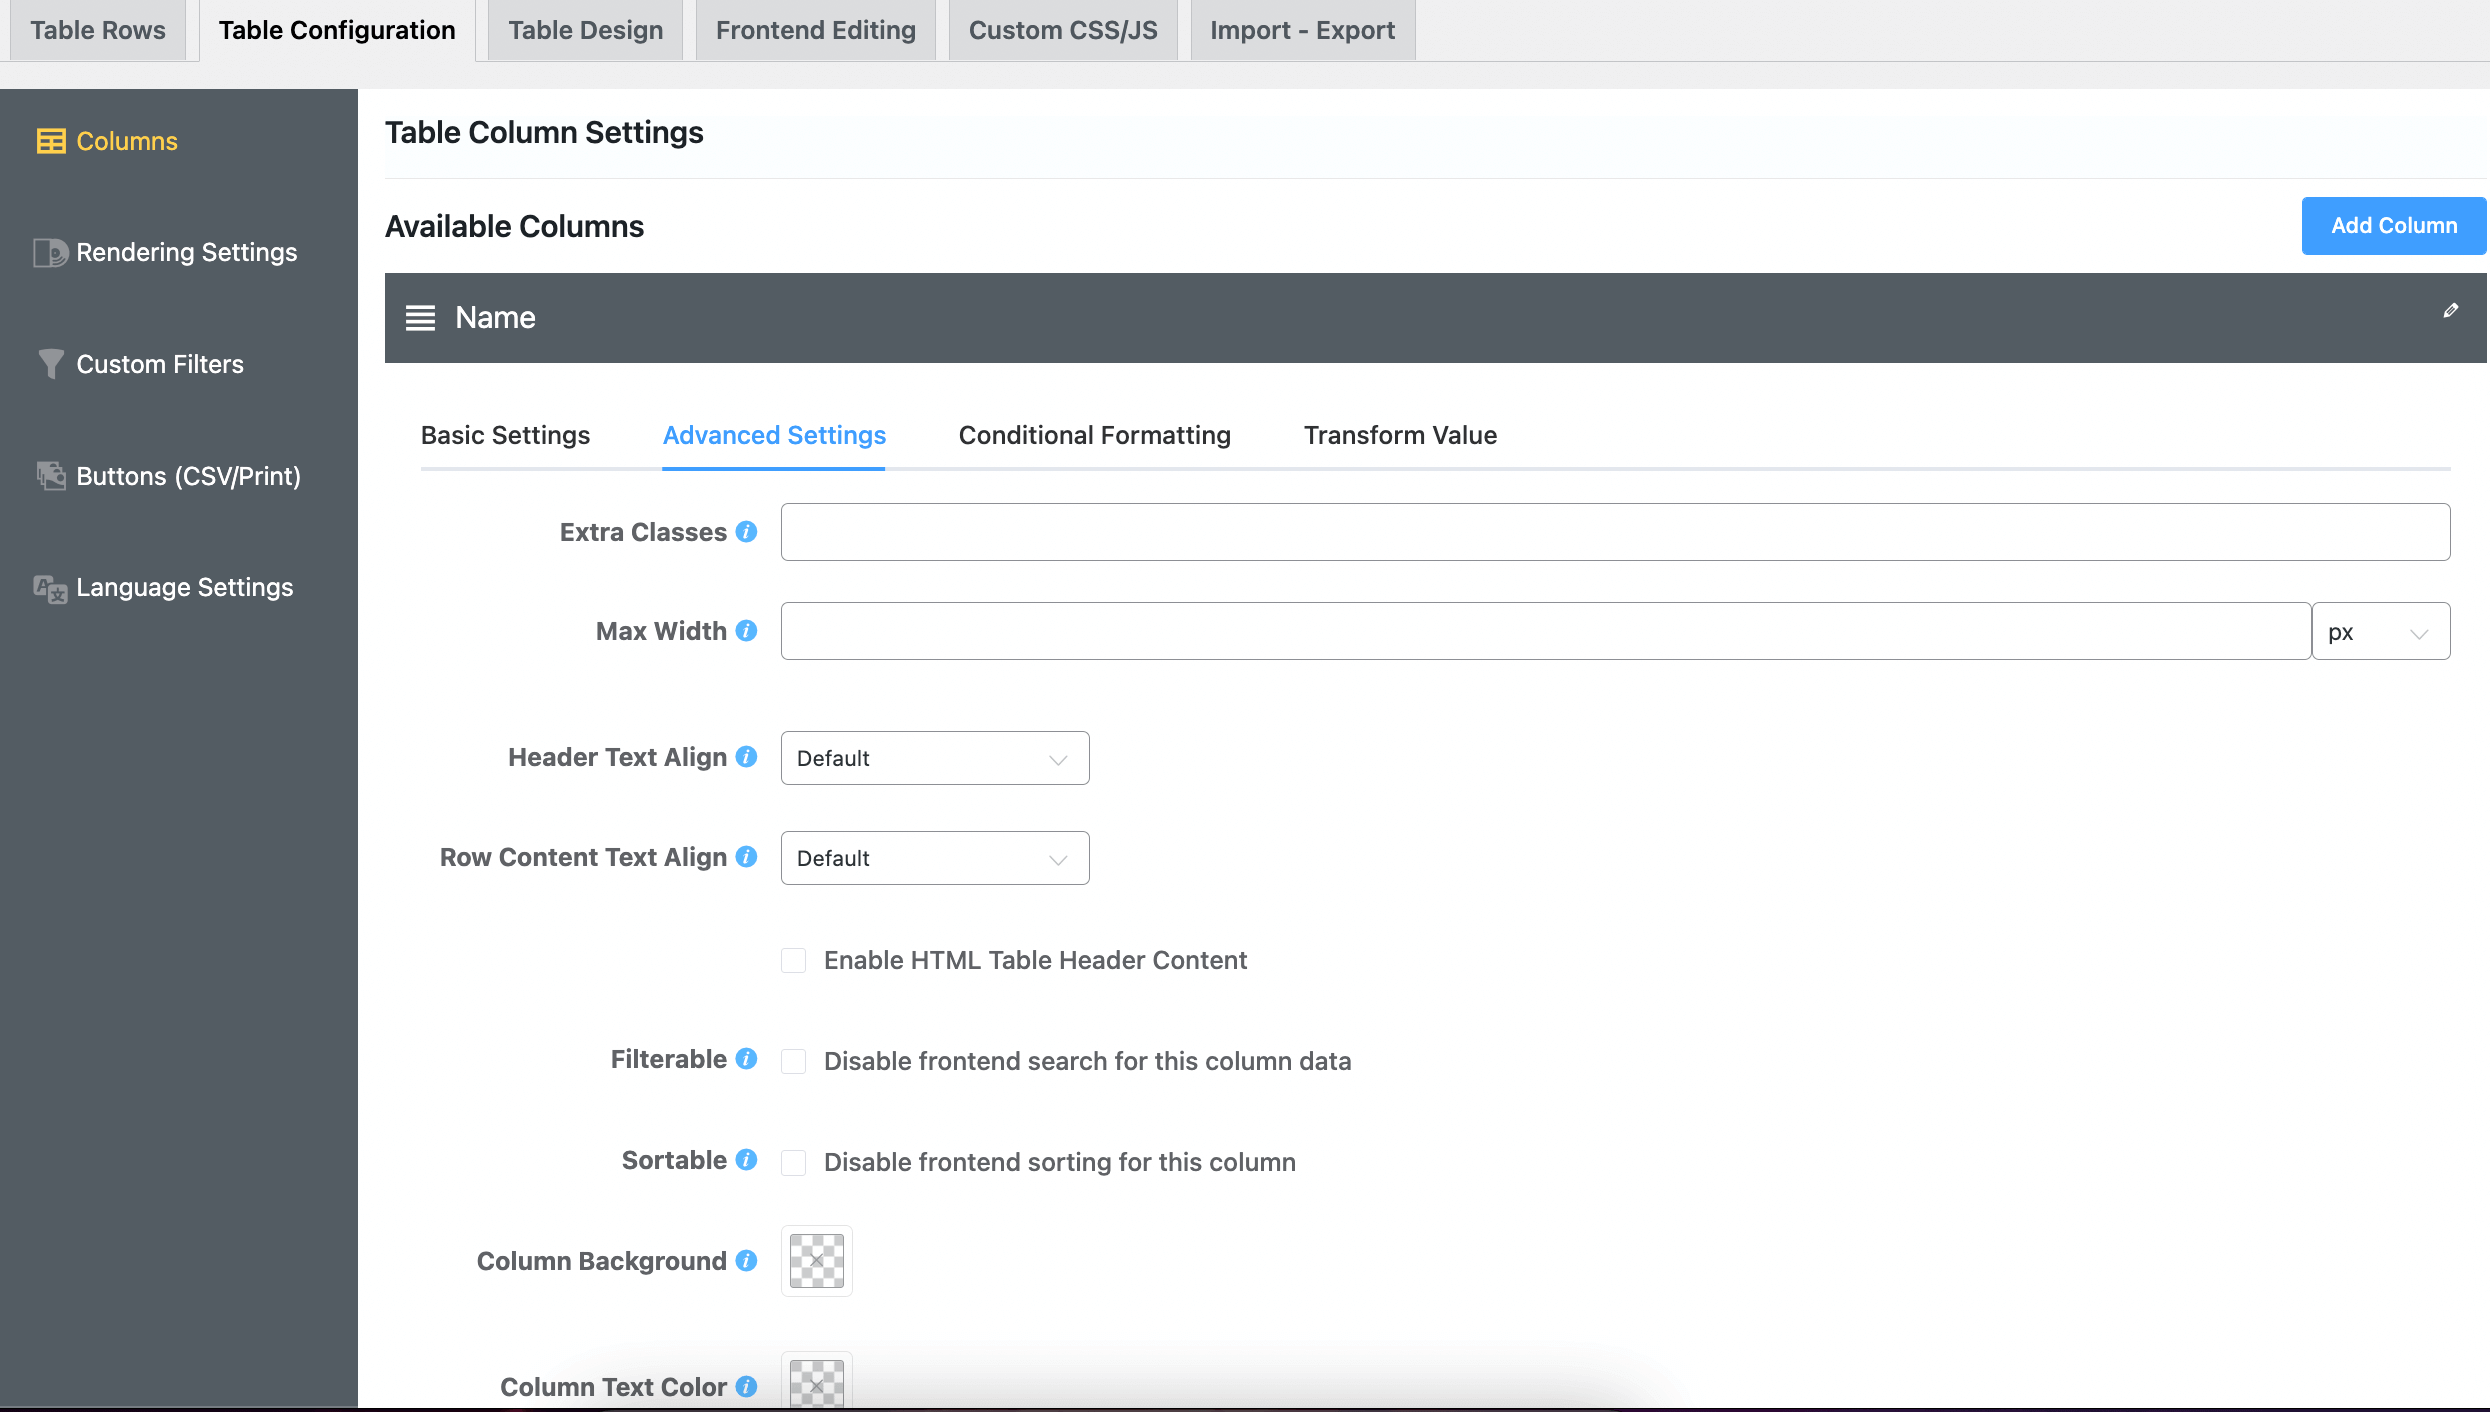
In Advanced Settings, you can have multiple options for configuring your columns.
Conditional Formatting #
Conditional Formatting will allow you to give a condition for formatting your columns in very different ways.

Transform Value #
Using Transform Value, you can change the plain text of a column to clickable hyperlinks.
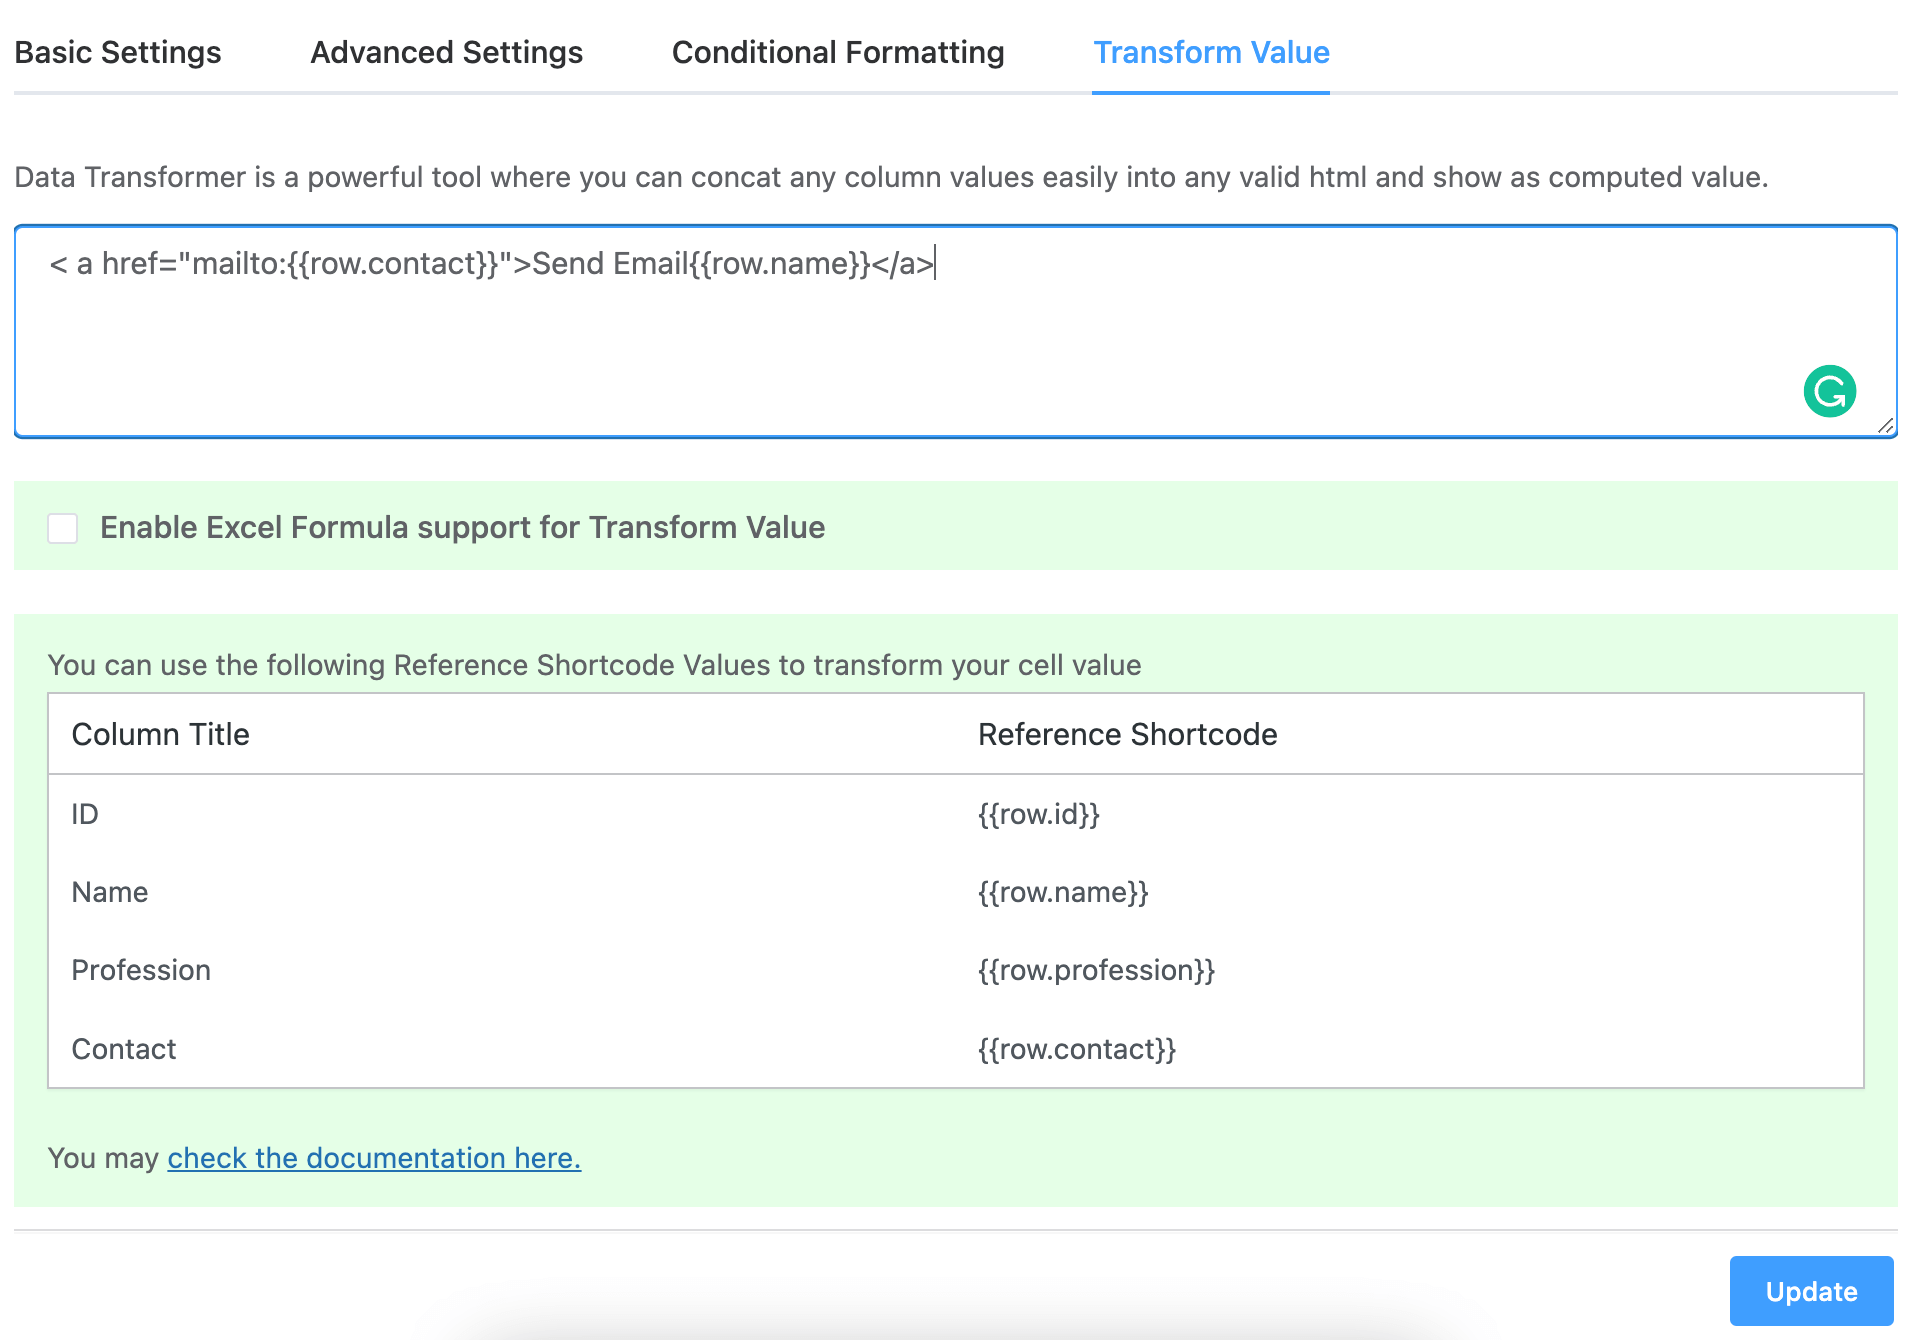
Table Design Tab #
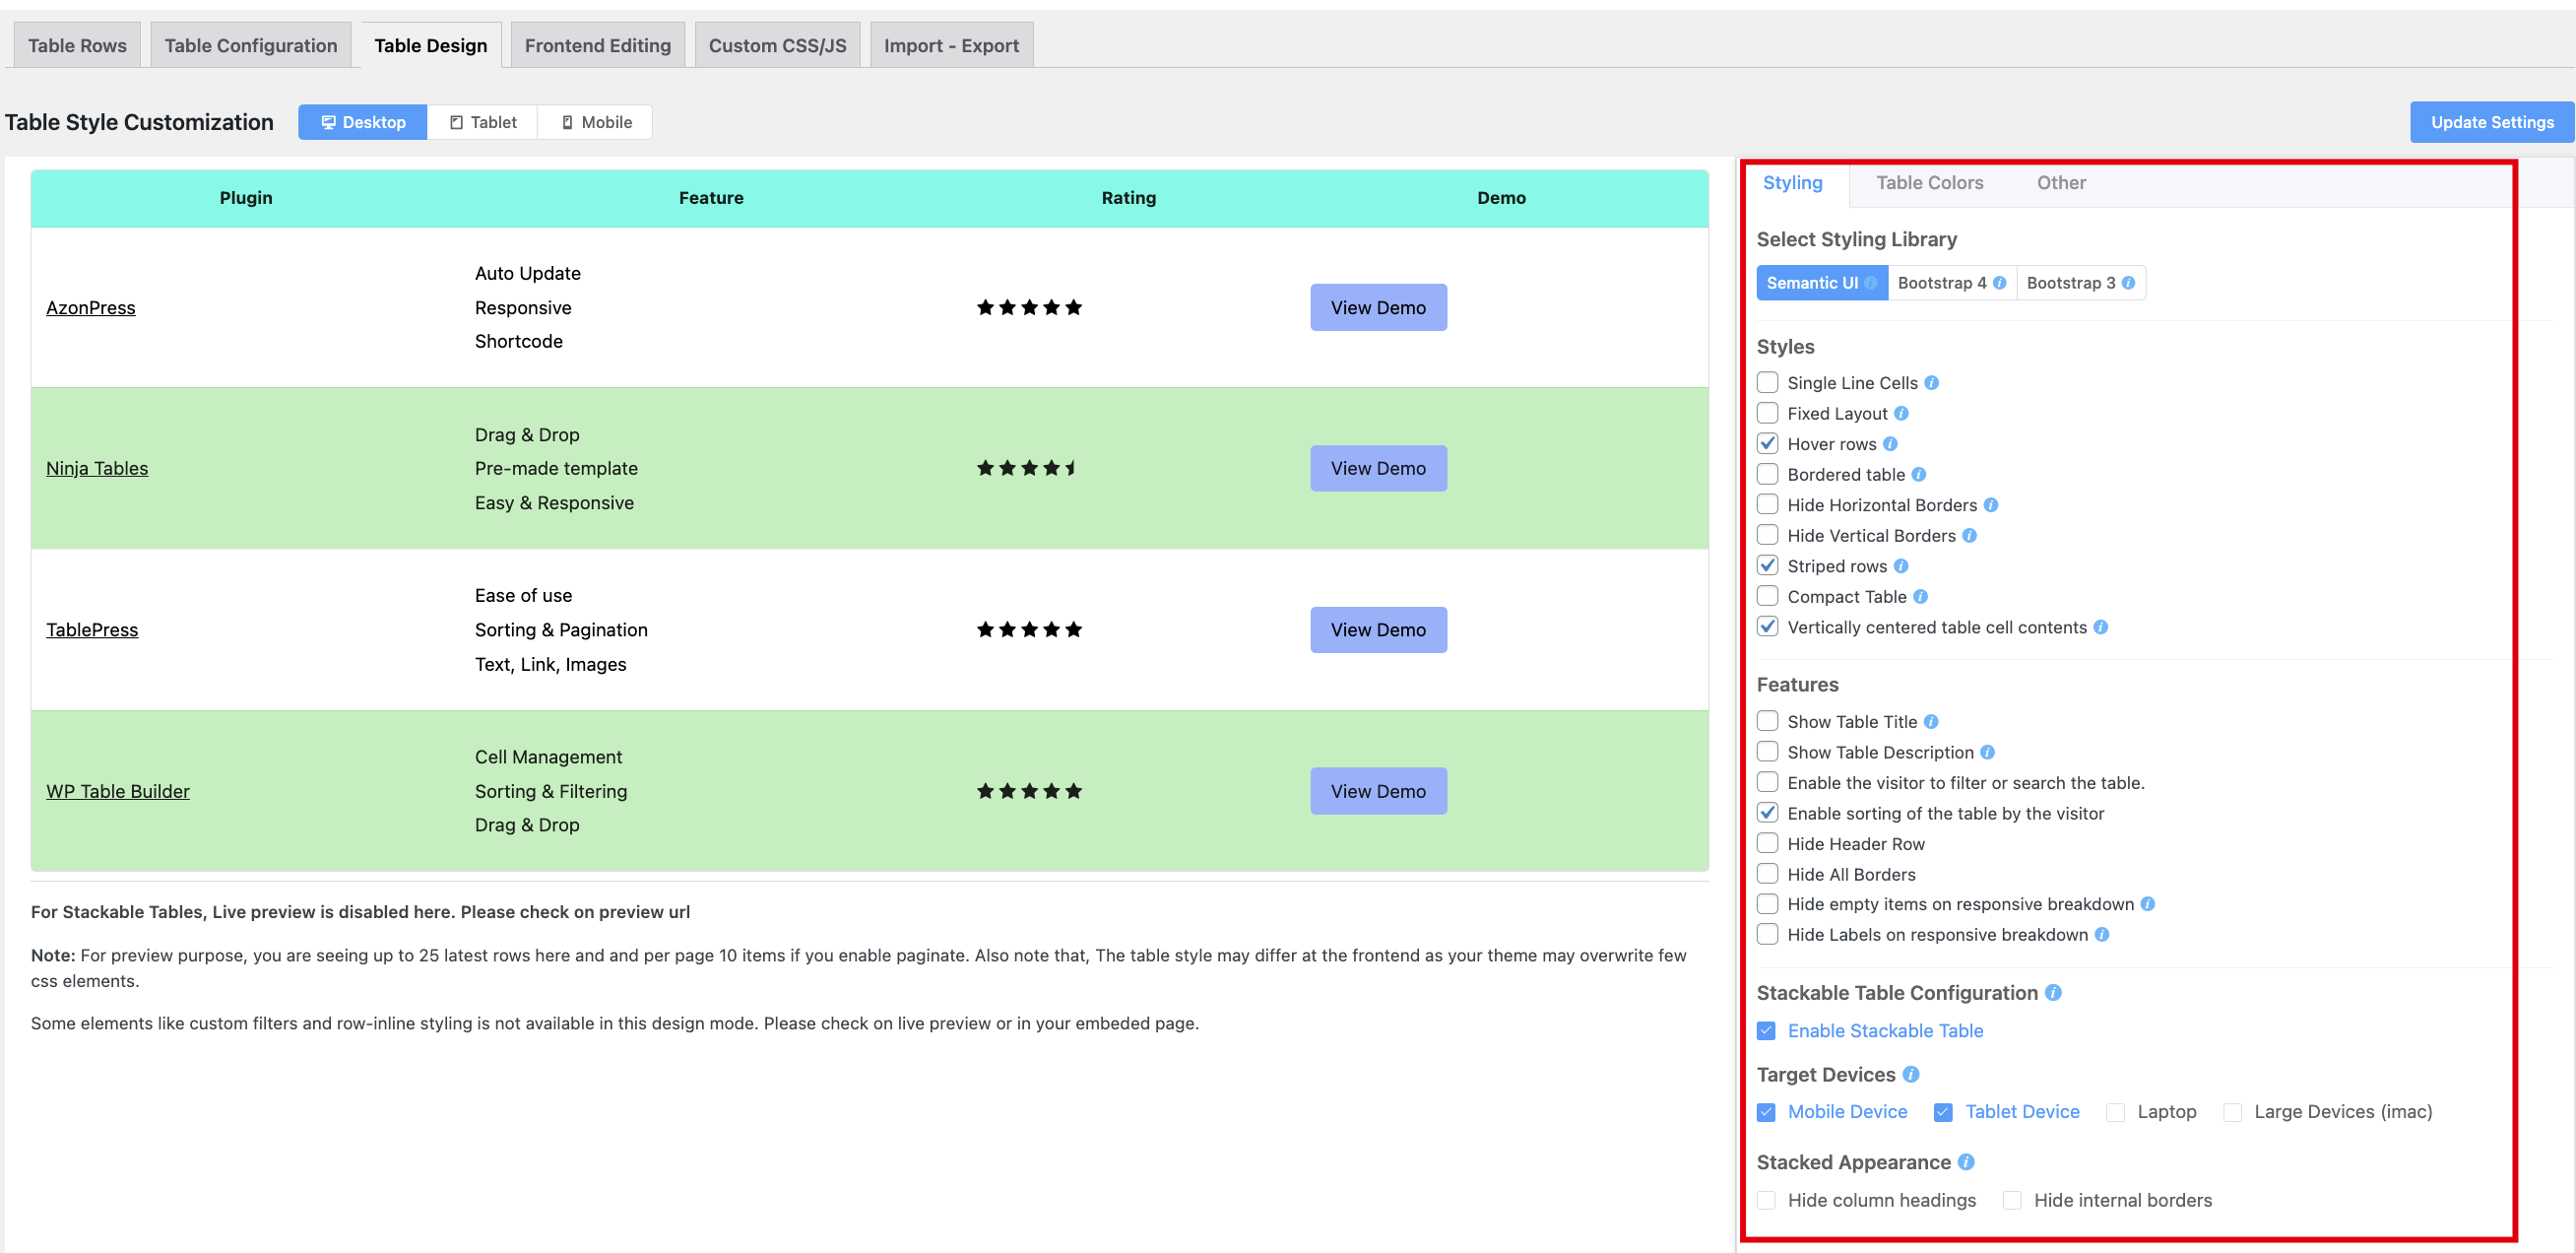
In this section, you will find three design options for configuring your tables. They are Styling, Table Colors & Other.
Styling #
On the right sidebar, you will notice the first tab, Styling. This tab itself has three separate styling options.
- The first feature is the Select Styling Library, which manages the library you have to work with. Three different libraries are available in this segment: Semantic UI, Bootstrap 4 & Bootstrap 3. Each of these libraries has various components once you select one of them.
- The second feature is the Styles option which offers several functions like Single Line Cells, Fixed Layout, Hover Rows, Bordered Table, and many more. Check these options according to your styling needs.
- The other function is the Features, which defines many components; you have to check the one you need to set your table.
- Last but not least, you can show your rows as a list item with a stackable table. You can target by device width.
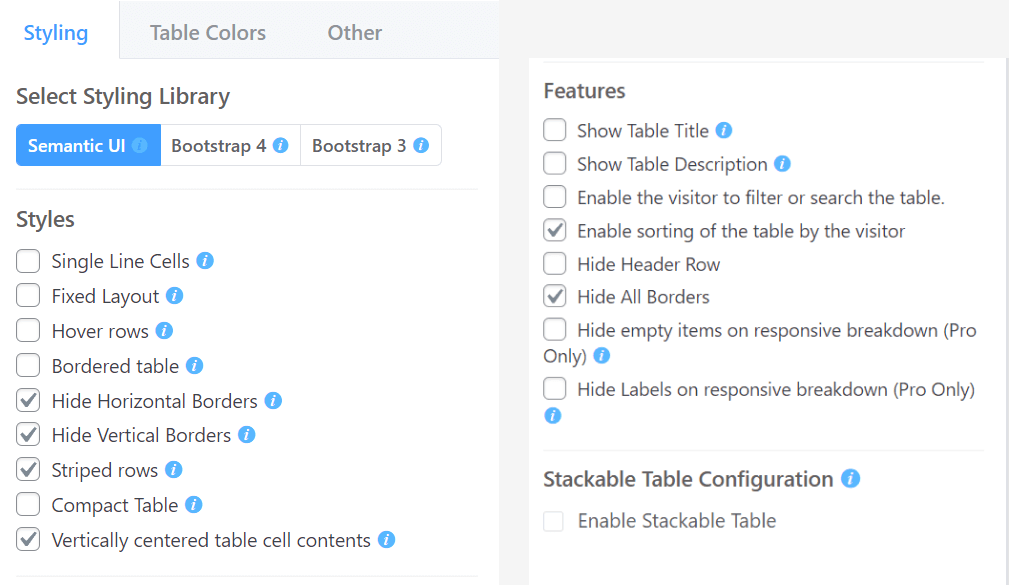
Table Colors #
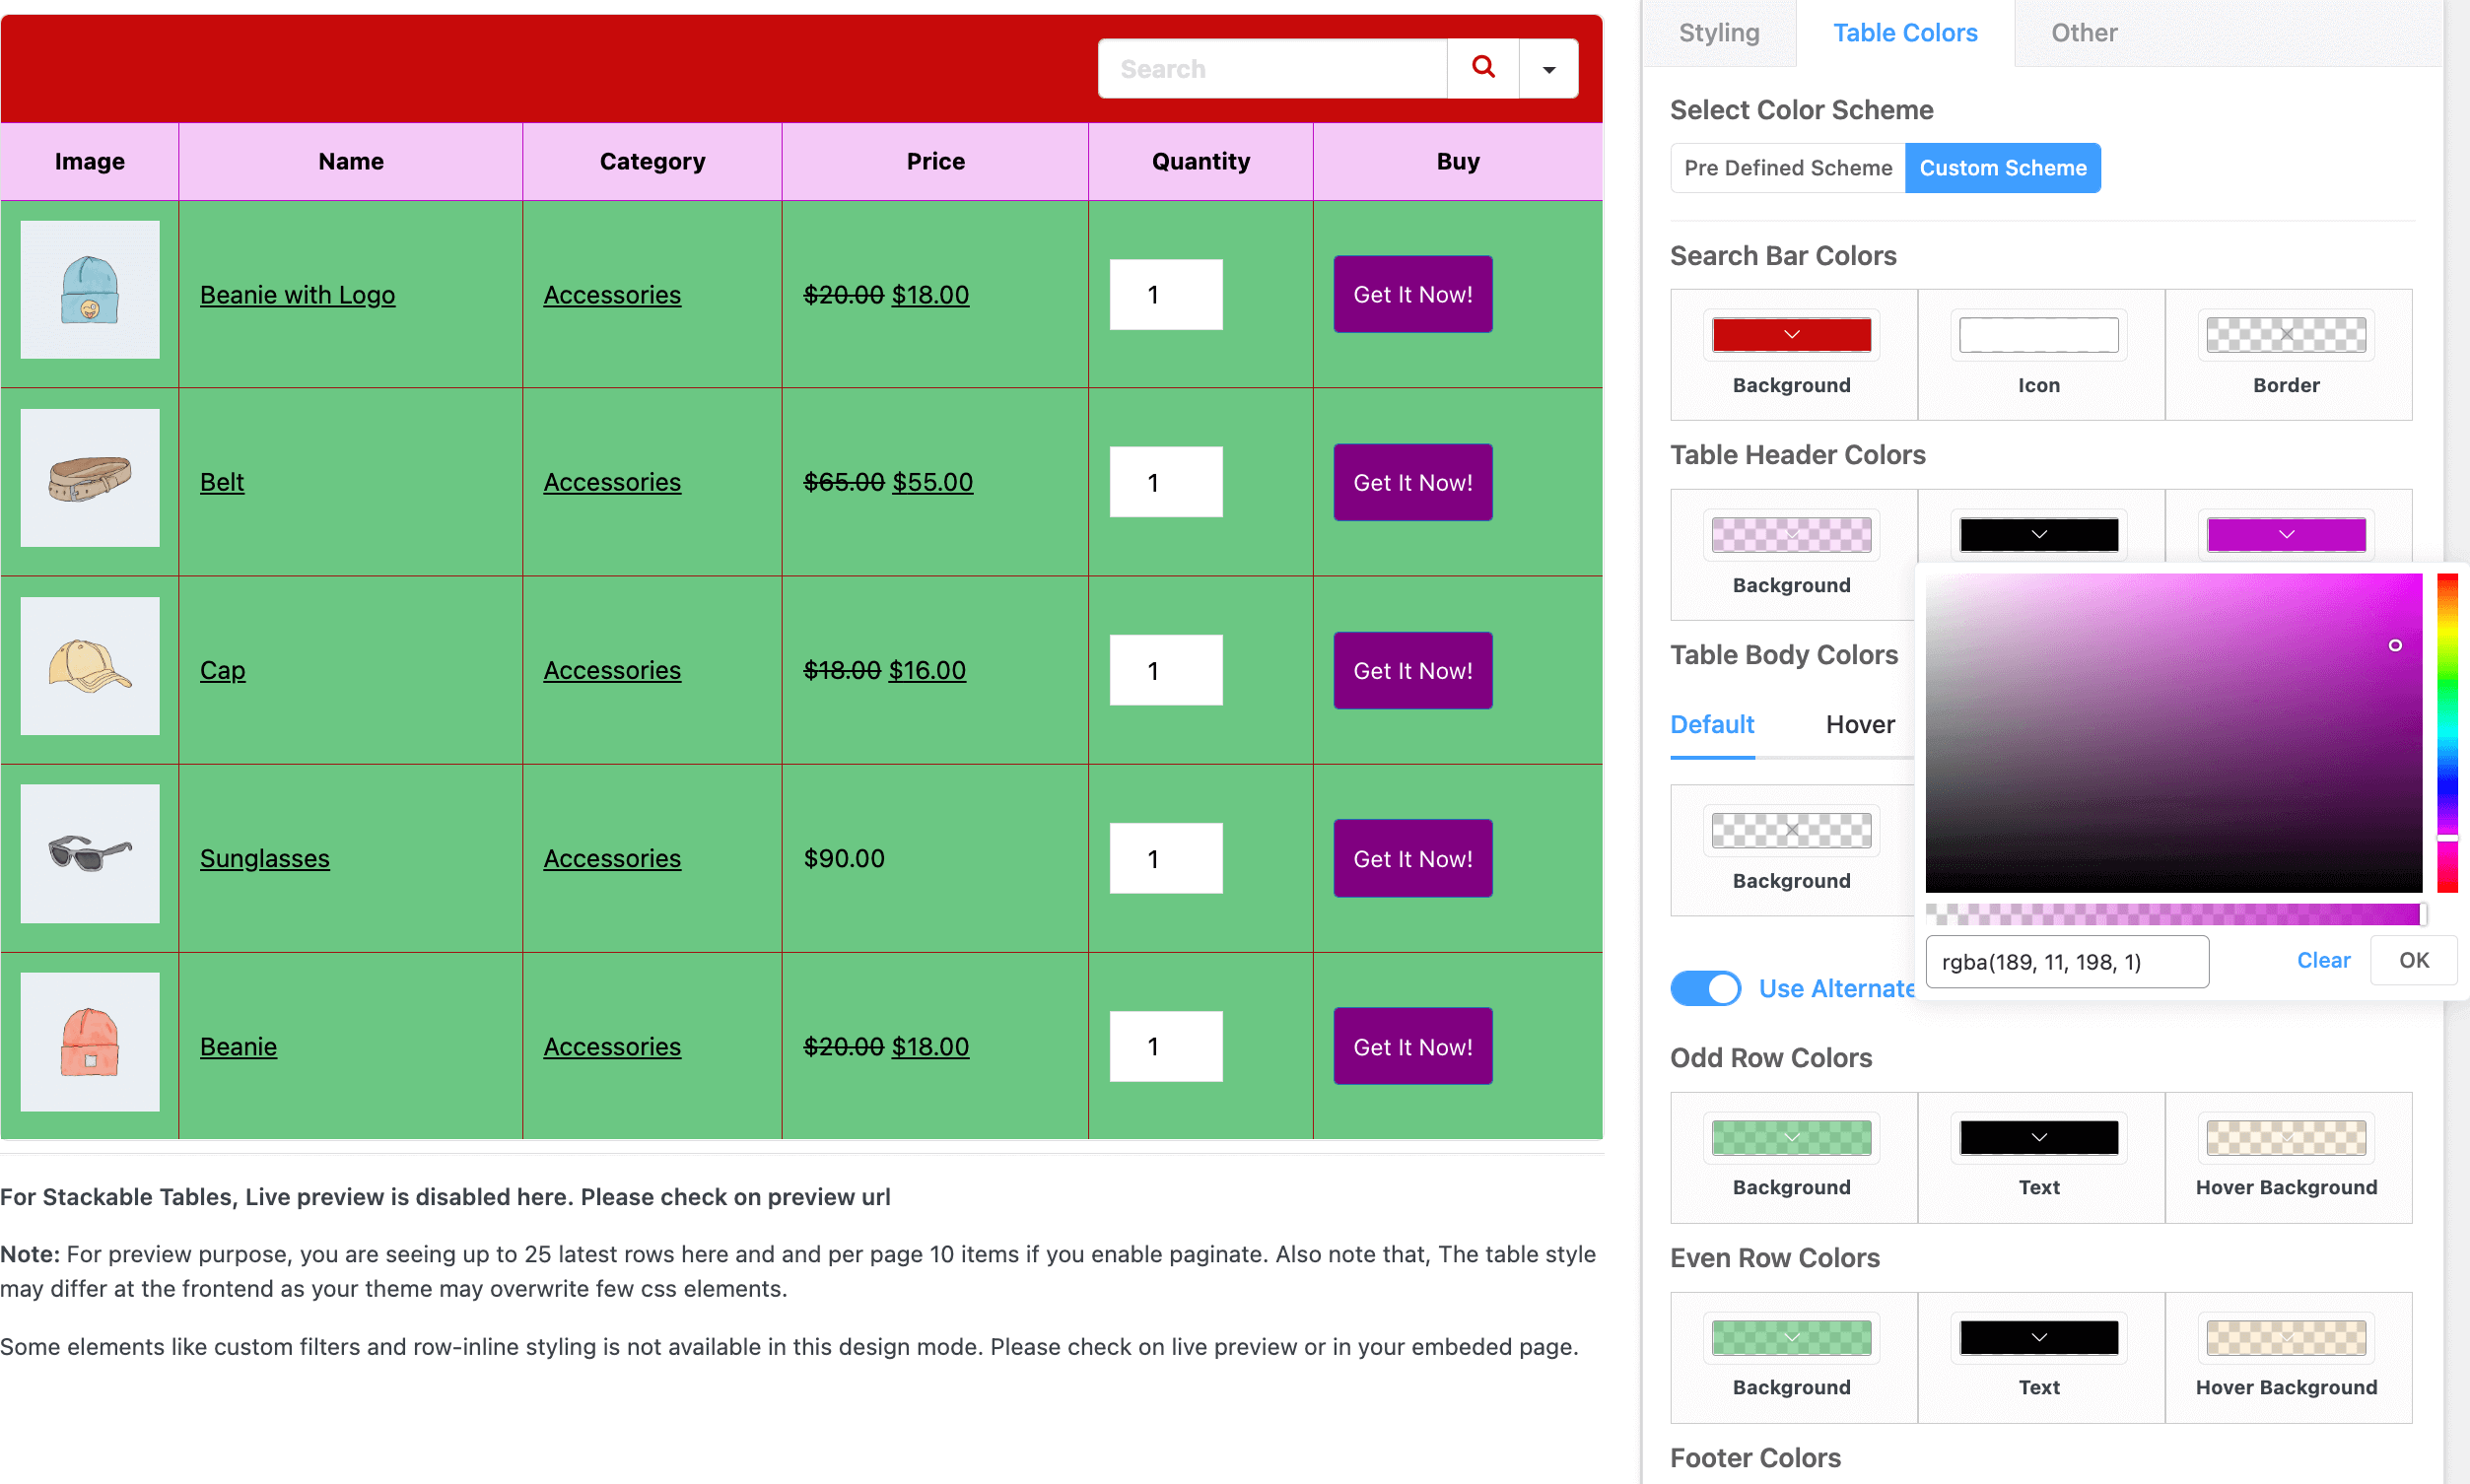
You can style your table in 13 different pre-defined color schemes. Feel free to check all those free color schemes.
Besides the free options, you have a “Custom Scheme” with unlimited color choices.
Other #
Pagination – Under the Other option, you will find the pagination section. In this section, you can select how many items you want to show per page. You can also disable pagination here.
Click on the Update Settings button after finishing up your table configuration.
Add, Duplicate, Delete Rows #
- After you click the Add Data button, it will let you add data for one row, another, and so on.
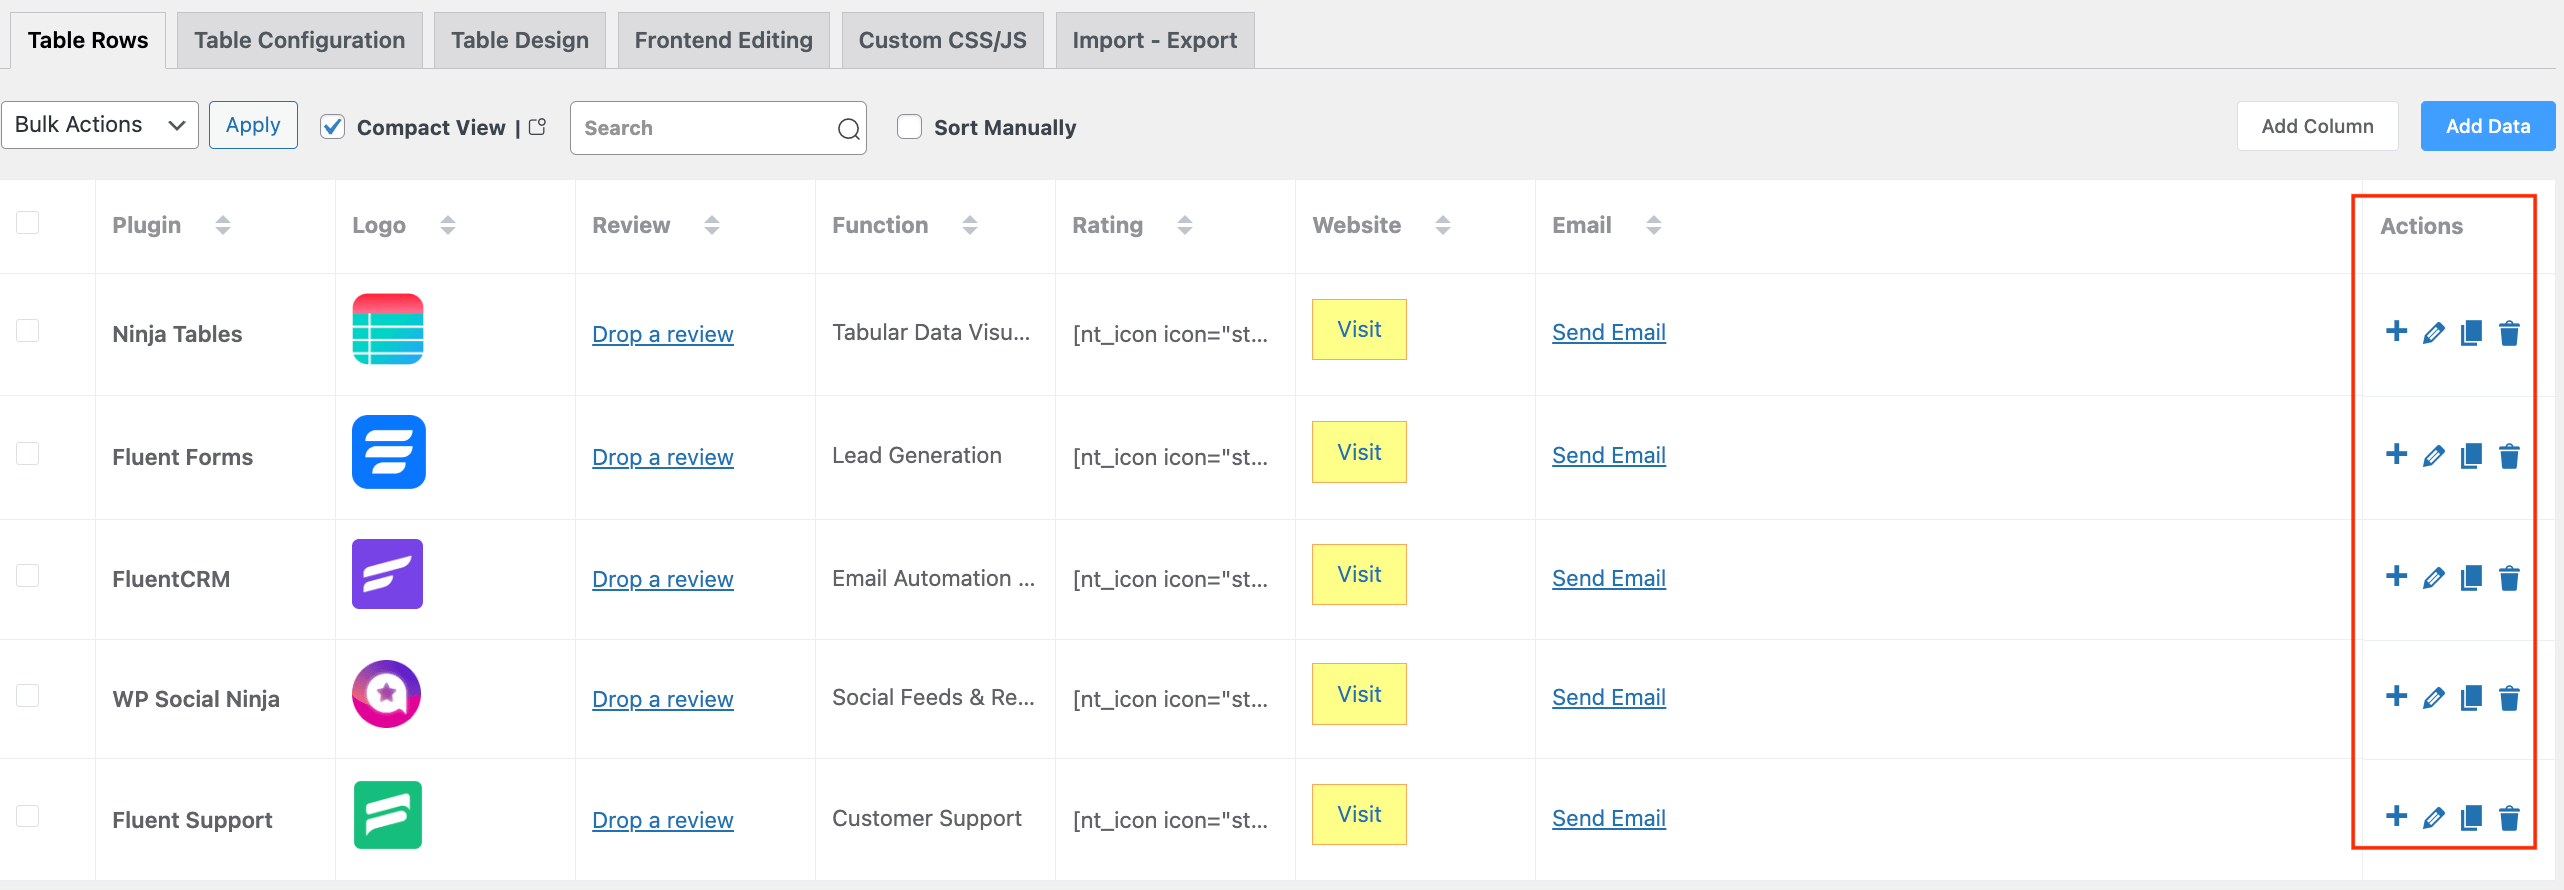
- In this Table Rows tab, you can also manage your data by deleting or updating the option under the Actions column on the right side of every row.
- You will find icons for editing, duplicating, updating row data and delete options.
Add Table to Frontend #
To incorporate a table into your website, navigate to Ninja Tables where you’ll find all your tables listed. Select the specific table you want in frontend, then click on its shortcode to copy it.

Paste the Shortcode on your desired page or post.

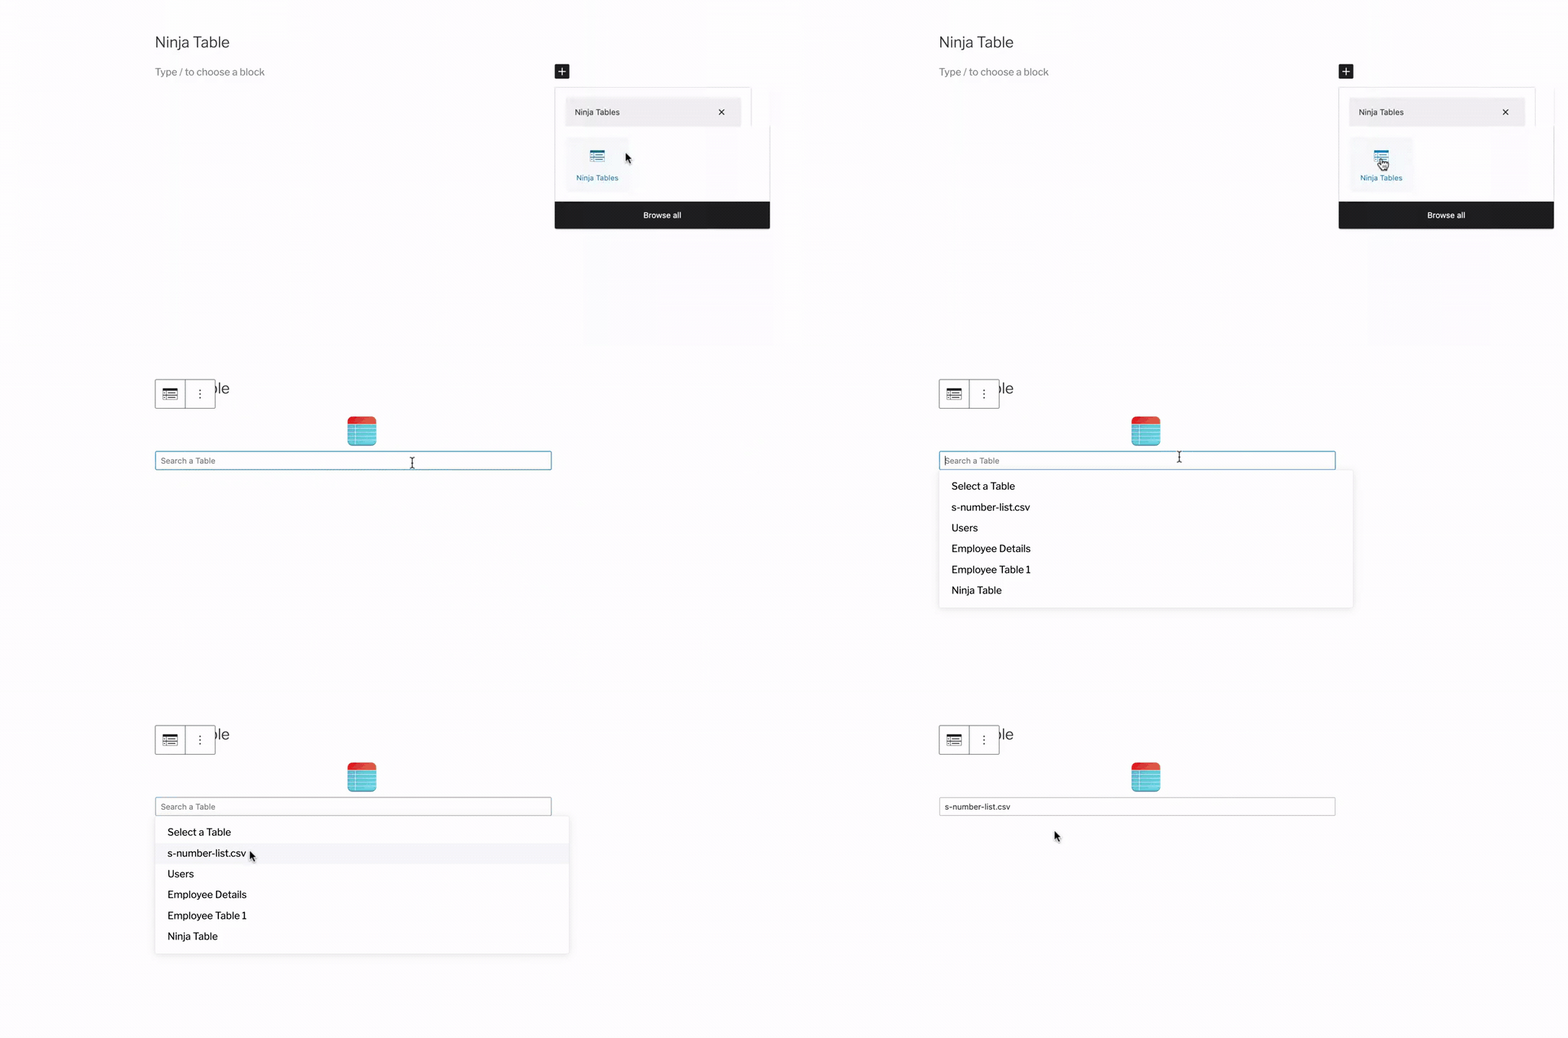
You can also easily add your table using the Ninja Tables block.
Simply go to the page or post where you’d like to embed your table. Look for the Ninja Tables Block and insert it. You’ll find a search field where you can look up the specific table you want to display on your frontend. Now click on the table name to insert it.
Use Bulk Action if you need to delete more than one entry. You can also duplicate each table using the icon in the table dashboard.
Let’s visually look at the video demonstration of the basic table setup using the Ninja Tables plugin.

hello Dear
I can’t display page numbers under the table? Why ?
How are the settings?
* enable paginate in ninjatables
how can I do?
thanks a lot
Hello,
Thank you for reaching out here. You can easily display page numbers under the table. Just check the below screenshot. Don’t forget to toggle off the Hide Pagination button if you have done it unintentionally. And then, if you have more that just 20 rows, you should see the numbers under your table.
https://prnt.sc/KwChD51y_BC-
If you still facing issues like you mentioned, kindly open a support ticket https://wpmanageninja.com/support-tickets/. You will surely get a solution within hours from our amazing support superheroes.
Regards,
Mohiuddin Omran