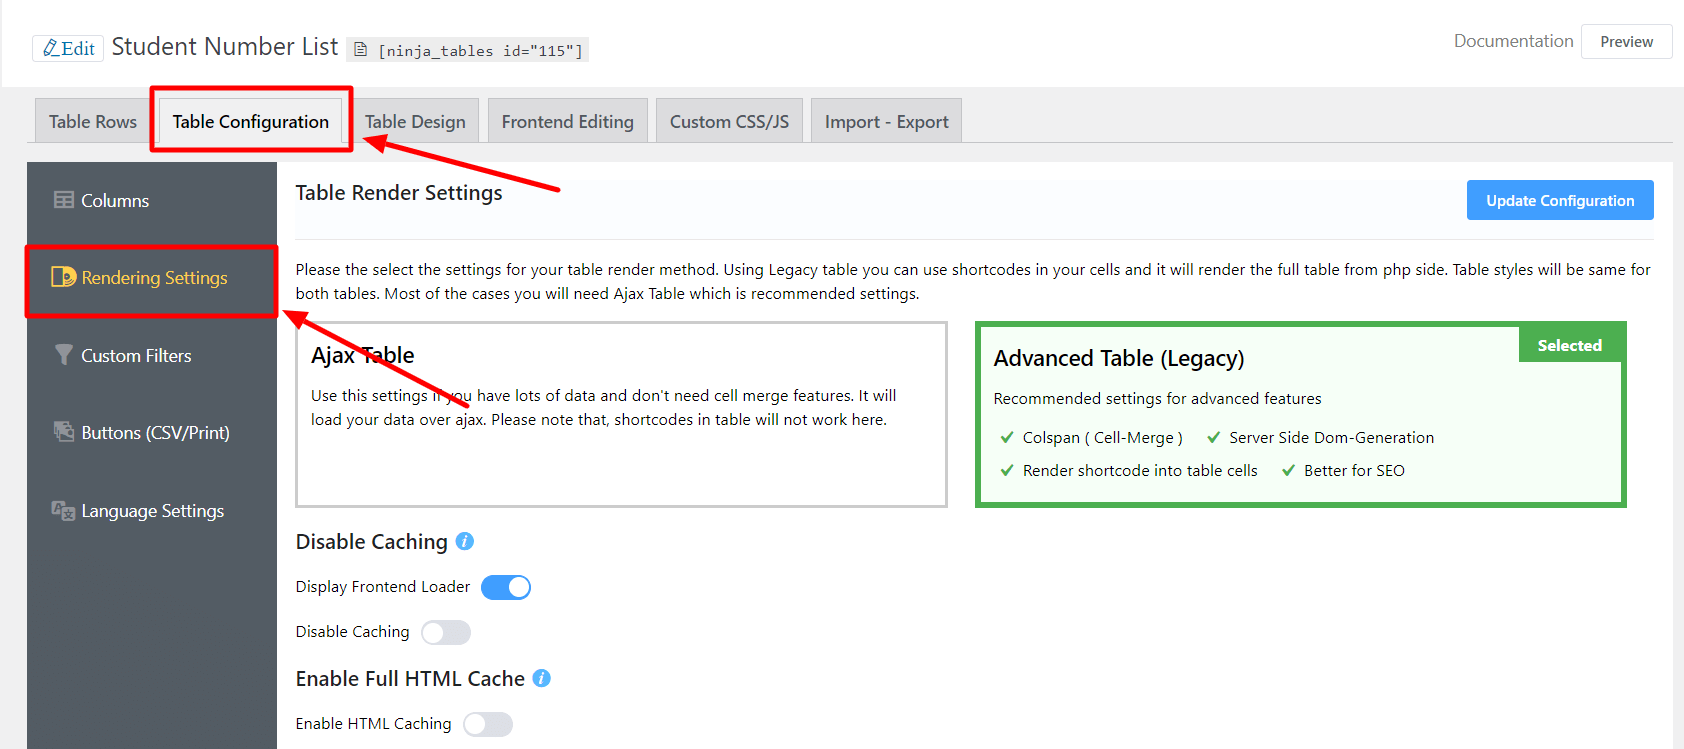
Ninja Tables offers Table Rendering Settings which is used for the table render method.
You can select between two- Ajax table & Advanced table (Legacy).
Table Rendering Settings Advanced Table (Legacy) is a Pro Feature!
- Go to the Table Configuration tab and you’ll see Rendering Settings on the left menubar.
- Click on Rendering Settings, a new tab will open with a Table Render Settings area.

Ajax Table #
You should use the Ajax Rendering Method when your table has a large amount of data. Here, data will load as a chunk.
Also, you can change the minimum chunk size by adding some code to the theme’s functions.php file. For example, we have set the minimum chunk size at 100.
add_filter('ninja_table_per_chunk', function($limit) {
return 100;
})
In this mode, you can’t use the cell merge/split feature or shortcodes in cells.
Advanced Table (Legacy table) #
In the Legacy Rendering Mode, the table loads in full HTML format and is totally readable by Google. But Google readable doesn’t mean that the data will show precisely in Google search rather, it depends on how you have set the table data in SEO.
Advanced Table (Legacy) is a Pro Feature!
To use the table cell merge/split feature and Shortcodes in cells, you must set Rendering Setting to Legacy.
Disable Caching #
To optimize and load faster, we cache the table contents. Disable caching is not recommended unless you know what you are doing.
Disable Frontend Loader: The frontend Loader is disabled by default. The loader you turned on will be visible when you click the Preview button while the table is loading.
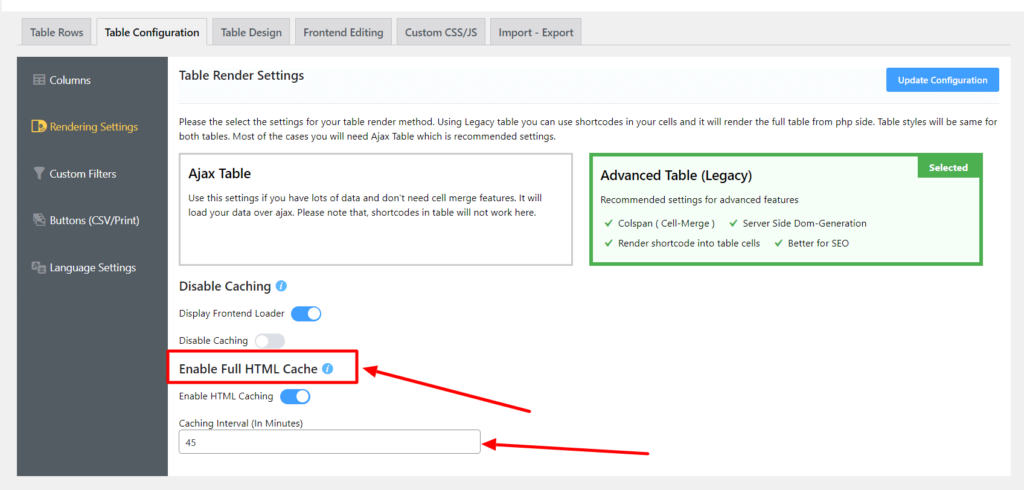
Enable Full HTML Cache #
If you enable this, Ninja Tables will cache the full HTML of the table and render that without interacting with the database. You can set the time for how many minutes it will cache each iteration.

Don’t forget to click on the Update Configuration button when you are done!
